You’ve got 7 seconds (or less) to impress your potential customers with your packaging. In a world prolific with an overabundance of brands of every kind, there’s probably a few competitors for your product that are angling for those same eyes – which means that your packaging needs to pull a potential customer’s focus in a beautiful, unique way.
We’ve spoken before about why you should use good packaging in your marketing campaigns, but how do you actually create photographs that catch a viewer’s eye?
Make a plan
It’s rare that a great photo campaign starts at the photoshoot. Creating a plan – even a quick one – that lays out what sorts of photos you need for digital marketing, social media, emails, and more (people in the biz call this a shot list) can help you streamline your process and ensure that you get every shot you may need on the day of the shoot.
If you’re already working with a package designer, they likely have great insight into what sorts of photos may work best for your product. Consulting them during the photography process can help you get great results in less time.
Photograph on different backgrounds
Photographing on different backgrounds can help put your photographs in context or provide flexibility for creative purposes later. Some backgrounds you should consider:
- White backgrounds are great because they help isolate your products, making it easy to cut them out in photo editing apps like Photoshop and apply new backgrounds or graphics that match your brand.
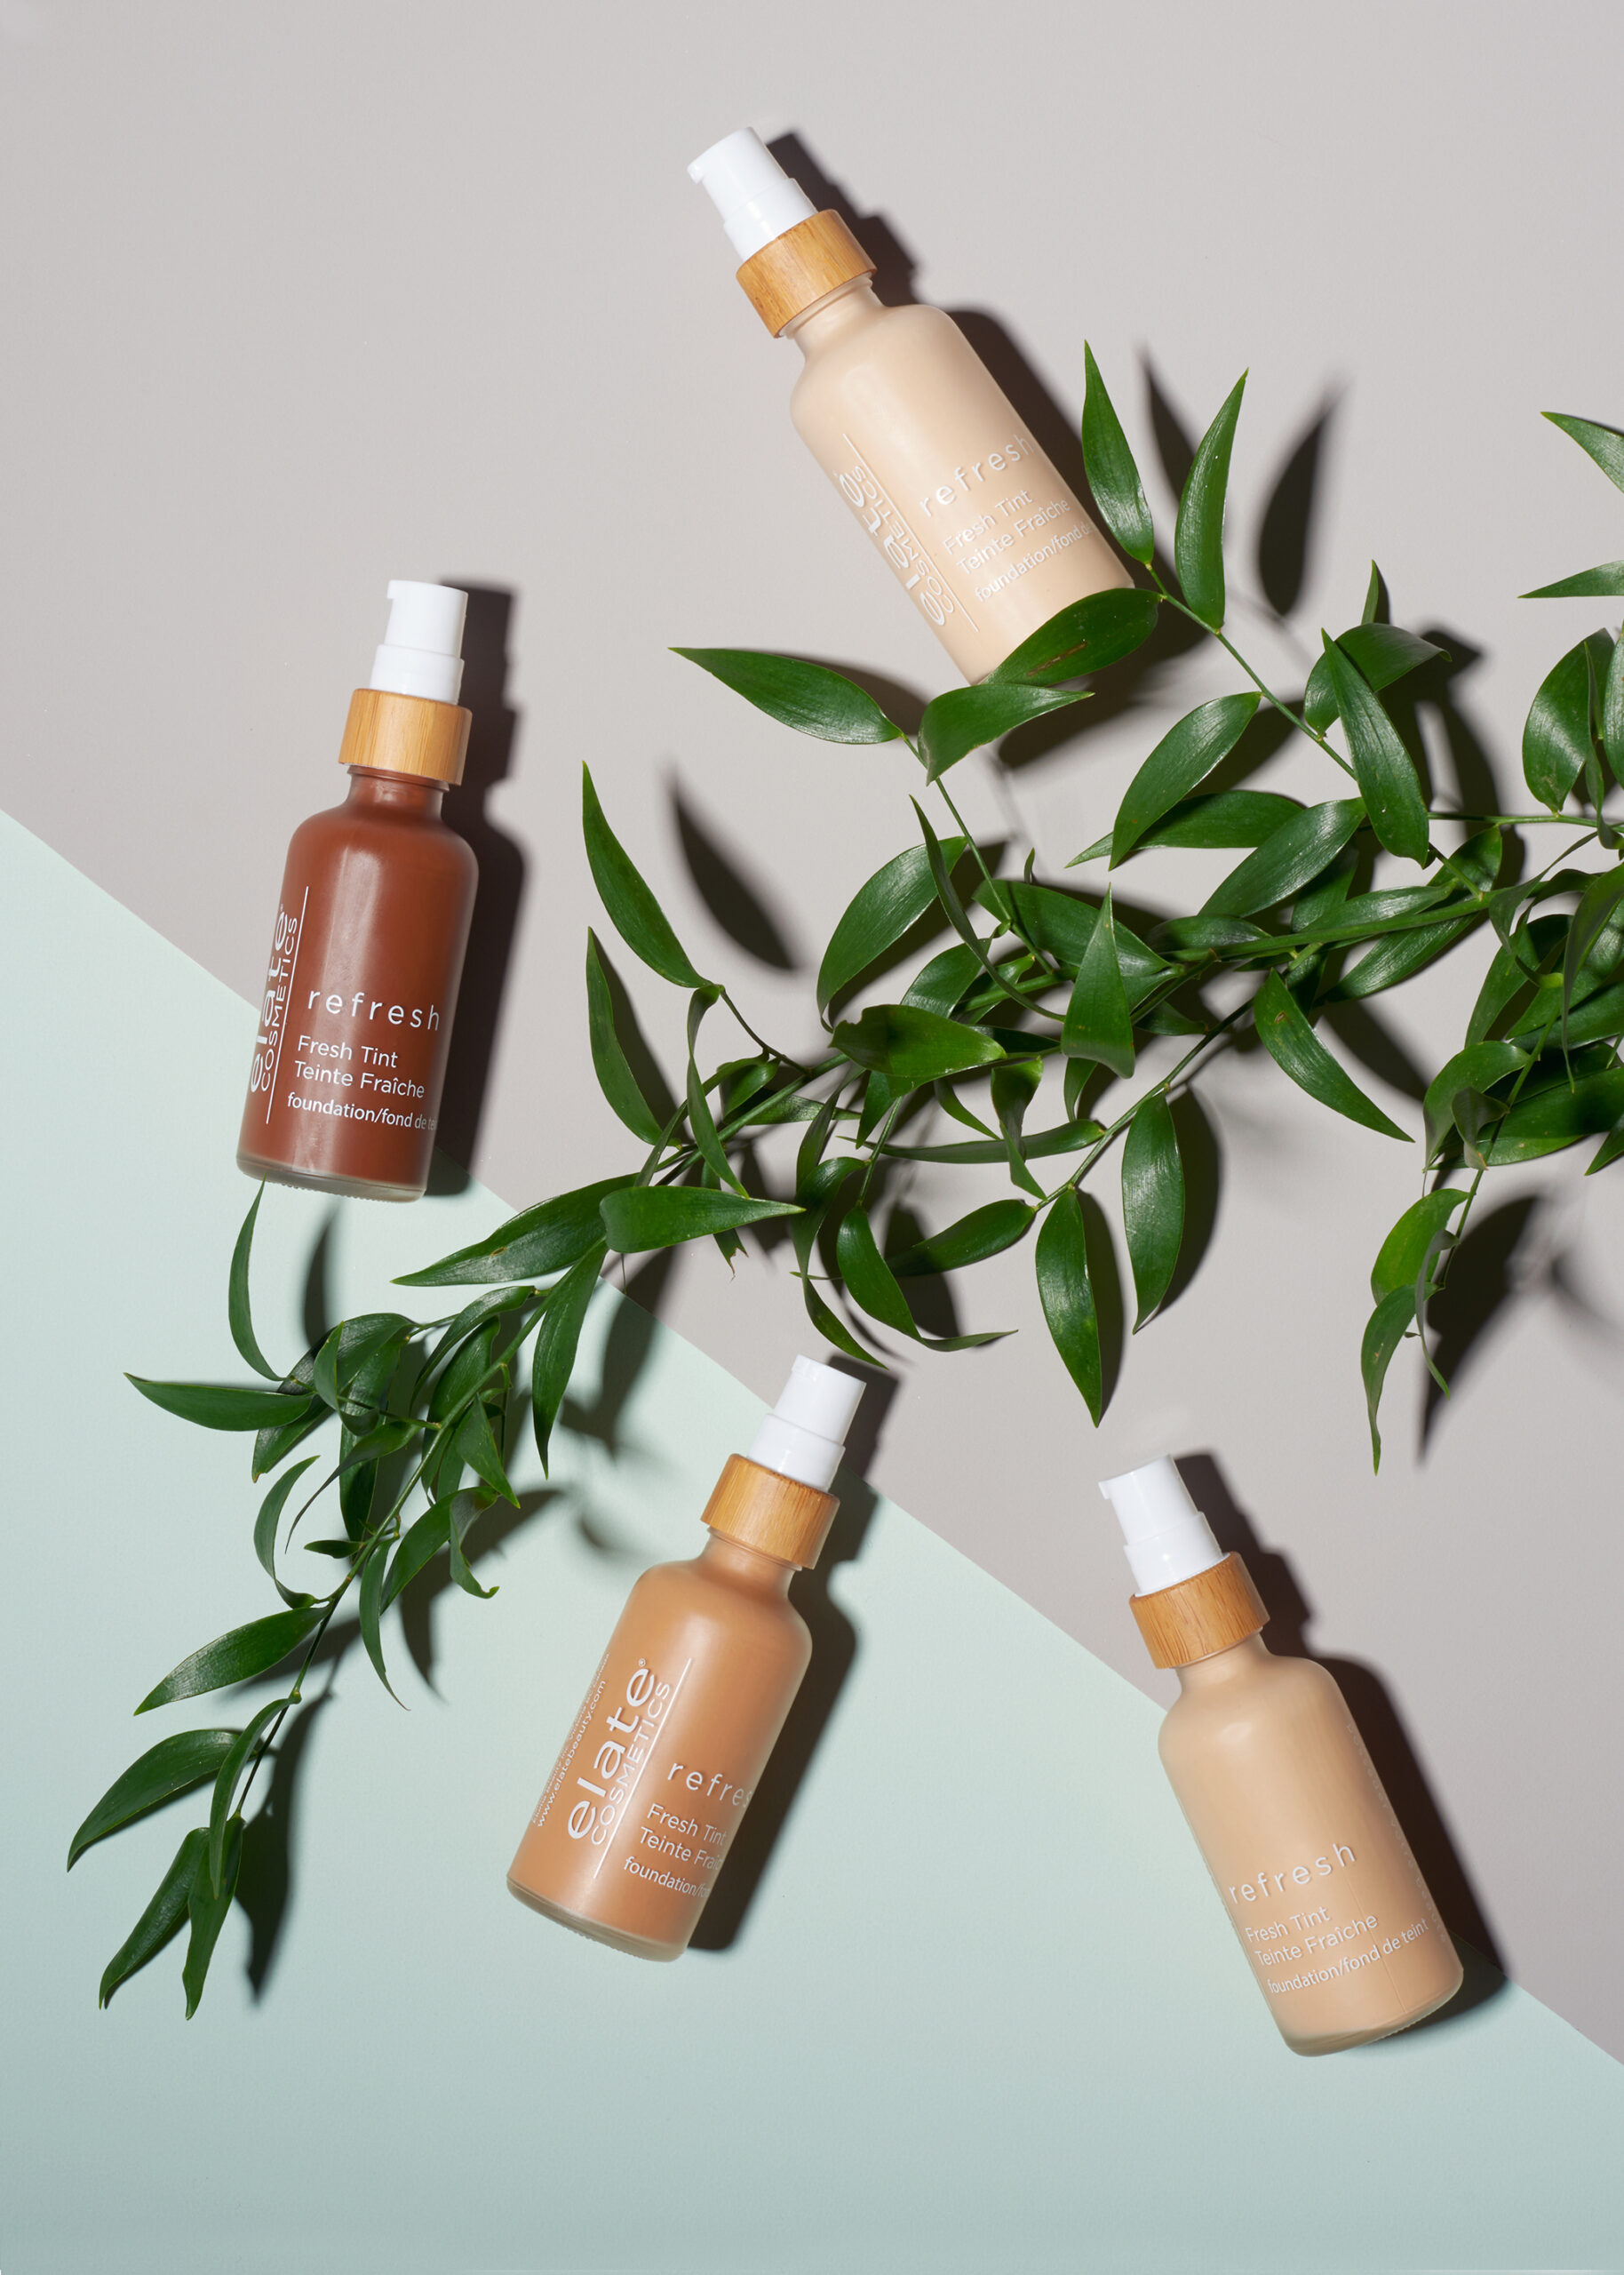
- Photographing with props can help provide context not only for where your product might be seen, but for who it might be used by. There are obvious ways to work with props – if you’re a bakery, your packaging photos should probably also show off your baked goods – but adding subtle touches that speak to your brand’s ethos can generate great connections with your prospective audience. For example, we love how Elate Cosmetics uses a backdrop of leaves to communicate what their brand is about without having to spell it out in text: that they’re eco-conscious and focus on “natural” cosmetics.
- Photographing your product in use provides a visual reason your audience may want to purchase your product. West Elm, for example, always places their products in relation to other products they carry, creating gorgeous, aspirational rooms that their customers are likely to appreciate. In this case, the photos also serve double duty: most of the things you see in a West Elm photo can also be purchased on the site, so they likely end up selling more products just from featuring multiple items in their shots.
Make a list of the equipment you need
While cell phone cameras have come a long way, they’re still not ideal for capturing high quality images in the settings you may need for good product photos. For that, you’ll need a good camera, which will have a larger sensor size than any cell phone camera will. Some other things to consider:
- A good, sturdy tripod
- Lighting: soft boxes for color-balanced, neutral lighting and light stands
- Backdrops: black and white are standard, but consider getting some in brand colors
- A good workspace with enough room to move around for different shots
- Lenses: Lenses less than 35mm in focal length are great for wide shots, and lenses with focal lengths between 50 and 135mm or good for general purposes photography with less distortion. If you’re working with small objects like jewelry and want to show fine detail, consider a macro lens.
- Software: If you’re editing the photos yourself, know that most photographers use programs like Adobe Photoshop and Lightroom to retouch or manipulate photos. However, many other options like GIMP and Paint Tool SAI also exist.
Packaging photography can show customers you’re serious about your branding, and therefore about your product. Make sure your images make the cut by planning ahead, gathering the right gear, using a good workspace for your project, and getting all the shots you need (on different backgrounds!) during the shoot.